| (13 intermediate revisions by the same user not shown) | |||
| Line 1: | Line 1: | ||
{{Structure infobox | {{Structure infobox | ||
|image = | |image = WLTOpen.png | ||
|imagesize = 350 | |imagesize = 350 | ||
|spawn = [[Heavy_Containment_Zone#SCP-049's Containment Area|SCP-049's Armory]] <br>[[Heavy_Containment_Zone#Warhead Silo|Nuke Room Armory]] | |spawn = [[Heavy_Containment_Zone#SCP-049's Containment Area|SCP-049's Armory]] <br>[[Heavy_Containment_Zone#Warhead Silo|Nuke Room Armory]] | ||
}} | }} | ||
The '''Weapon Locker Type 21''' is a type of [[Site-02|Structure]] found in ''SCP: Secret Laboratory''. | |||
The '''Weapon Locker Type 21''' is a type of [[ | __TOC__ | ||
Each | ==Description== | ||
Weapon Locker Type 21 is a locker that has multiple different cabinet doors.<br> | |||
<div style="white-space:normal; font-size:15px">Each cabinet will contain loot inside it. Large cabinets require {{HoverKeycard|Required Access1=AA2}} to open and close, while the small cabinets require {{HoverKeycard|Required Access1=AA1}} to open and close. There is also a drawer at the bottom that can be opened without a Keycard, and can contain some items as well.</div> | |||
==Location== | ==Location== | ||
| Line 14: | Line 16: | ||
'''Possible Loot:'''<br> | '''Possible Loot:'''<br> | ||
<big><u>Large Cabinets</u></big><br> | <big><u>Large Cabinets</u></big><br> | ||
Requires | <div style="white-space:normal; font-size:15px">Requires {{HoverKeycard|Required Access1=AA2}} to open.</div> | ||
The Large Cabinets contain the following loot: | The Large Cabinets contain the following loot: | ||
{|border="1" style="border-collapse:collapse" | {|border="1" style="border-collapse:collapse" | ||
| Line 23: | Line 25: | ||
|colspan="2" style="border-style: solid; border-width: 1px 0 1px 1px;border-right:solid 2px white;padding: 5px;background-color:#111111;"|{{914 Item 2|5.56x45mm|total=40-80 Rounds}} | |colspan="2" style="border-style: solid; border-width: 1px 0 1px 1px;border-right:solid 2px white;padding: 5px;background-color:#111111;"|{{914 Item 2|5.56x45mm|total=40-80 Rounds}} | ||
|style="padding: 5px;text-align:center;background-color:#111111;"|3 | |style="padding: 5px;text-align:center;background-color:#111111;"|3 | ||
|style="padding: 5px;text-align:center;background-color:#111111;"| | |style="padding: 5px;text-align:center;background-color:#111111;"|{{WeightedProbability|totalWeight=7}} | ||
|- | |- | ||
|colspan="2" style="border-style: solid; border-width: 1px 0 1px 1px;border-right:solid 2px white;padding: 5px;background-color:#111111;"|{{914 Item 2|Light Armor}} | |colspan="2" style="border-style: solid; border-width: 1px 0 1px 1px;border-right:solid 2px white;padding: 5px;background-color:#111111;"|{{914 Item 2|Light Armor}} | ||
|style="padding: 5px;text-align:center;background-color:#111111;"|1 | |style="padding: 5px;text-align:center;background-color:#111111;"|1 | ||
|style="padding: 5px;text-align:center;background-color:#111111;"| | |style="padding: 5px;text-align:center;background-color:#111111;"|{{WeightedProbability|totalWeight=7}} | ||
|- | |- | ||
|colspan="2" style="border-style: solid; border-width: 1px 0 1px 1px;border-right:solid 2px white;padding: 5px;background-color:#111111;"|{{914 Item 2|Combat Armor}} | |colspan="2" style="border-style: solid; border-width: 1px 0 1px 1px;border-right:solid 2px white;padding: 5px;background-color:#111111;"|{{914 Item 2|Combat Armor}} | ||
|style="padding: 5px;text-align:center;background-color:#111111;"|2 | |style="padding: 5px;text-align:center;background-color:#111111;"|2 | ||
|style="padding: 5px;text-align:center;background-color:#111111;"| | |style="padding: 5px;text-align:center;background-color:#111111;"|{{WeightedProbability|totalWeight=7}} | ||
|- | |- | ||
|colspan="2" style="border-style: solid; border-width: 1px 0 1px 1px;border-right:solid 2px white;padding: 5px;background-color:#111111;"|{{914 Item 2|Heavy Armor}} | |colspan="2" style="border-style: solid; border-width: 1px 0 1px 1px;border-right:solid 2px white;padding: 5px;background-color:#111111;"|{{914 Item 2|Heavy Armor}} | ||
|style="padding: 5px;text-align:center;background-color:#111111;"|1 | |style="padding: 5px;text-align:center;background-color:#111111;"|1 | ||
|style="padding: 5px;text-align:center;background-color:#111111;"| | |style="padding: 5px;text-align:center;background-color:#111111;"|{{WeightedProbability|totalWeight=7}} | ||
|- | |- | ||
|colspan="2" style="border-style: solid; border-width: 1px 0 1px 1px;border-right:solid 2px white;padding: 5px;background-color:#111111;"|{{914 Item 2|Crossvec}} | |colspan="2" style="border-style: solid; border-width: 1px 0 1px 1px;border-right:solid 2px white;padding: 5px;background-color:#111111;"|{{914 Item 2|Crossvec}} | ||
|style="padding: 5px;text-align:center;background-color:#111111;"|2 | |style="padding: 5px;text-align:center;background-color:#111111;"|2 | ||
|style="padding: 5px;text-align:center;background-color:#111111;"| | |style="padding: 5px;text-align:center;background-color:#111111;"|{{WeightedProbability|totalWeight=7}} | ||
|- | |- | ||
|colspan="2" style="border-style: solid; border-width: 1px 0 1px 1px;border-right:solid 2px white;padding: 5px;background-color:#111111;"|{{914 Item 2|FSP-9}} | |colspan="2" style="border-style: solid; border-width: 1px 0 1px 1px;border-right:solid 2px white;padding: 5px;background-color:#111111;"|{{914 Item 2|FSP-9}} | ||
|style="padding: 5px;text-align:center;background-color:#111111;"|2 | |style="padding: 5px;text-align:center;background-color:#111111;"|2 | ||
|style="padding: 5px;text-align:center;background-color:#111111;"| | |style="padding: 5px;text-align:center;background-color:#111111;"|{{WeightedProbability|totalWeight=7}} | ||
|- | |- | ||
|colspan="2" style="border-style: solid; border-width: 1px 0 1px 1px;border-right:solid 2px white;padding: 5px;background-color:#111111;"|{{914 Item 2|COM-18}} | |colspan="2" style="border-style: solid; border-width: 1px 0 1px 1px;border-right:solid 2px white;padding: 5px;background-color:#111111;"|{{914 Item 2|COM-18}} | ||
|style="padding: 5px;text-align:center;background-color:#111111;"|1 | |style="padding: 5px;text-align:center;background-color:#111111;"|1 | ||
|style="padding: 5px;text-align:center;background-color:#111111;"| | |style="padding: 5px;text-align:center;background-color:#111111;"|{{WeightedProbability|totalWeight=7}} | ||
|} | |} | ||
<big><u>Small Cabinets</u></big><br> | <big><u>Small Cabinets</u></big><br> | ||
Requires | <div style="white-space:normal; font-size:15px">Requires {{HoverKeycard|Required Access1=AA1}} to open.</div> | ||
The Small Cabinets | The Small Cabinets have two different loot tables, a "default" loot table, and a second one that is only used for the HCZ/EZ Checkpoint spawn. | ||
{|border="1" style="border-collapse:collapse" | {|border="1" style="border-collapse:collapse" | ||
!colspan="2" style="border-style: solid; border-width: 1px 2px 1px 1px;border-right:solid 2px white; text-align:center;padding: 5px;background-color:#333333;" |Item | !colspan="2" style="border-style: solid; border-width: 1px 2px 1px 1px;border-right:solid 2px white; text-align:center;padding: 5px;background-color:#333333;" |Item | ||
| Line 59: | Line 61: | ||
|colspan="2" style="border-style: solid; border-width: 1px 0 1px 1px;border-right:solid 2px white;padding: 5px;background-color:#111111;"|{{914 Item 2|5.56x45mm|total=40-80 Rounds}} | |colspan="2" style="border-style: solid; border-width: 1px 0 1px 1px;border-right:solid 2px white;padding: 5px;background-color:#111111;"|{{914 Item 2|5.56x45mm|total=40-80 Rounds}} | ||
|style="padding: 5px;text-align:center;background-color:#111111;"|3 | |style="padding: 5px;text-align:center;background-color:#111111;"|3 | ||
|style="padding: 5px;text-align:center;background-color:#111111;"| | |style="padding: 5px;text-align:center;background-color:#111111;"|{{WeightedProbability|weight=1|totalWeight=5}} | ||
|- | |- | ||
|colspan="2" style="border-style: solid; border-width: 1px 0 1px 1px;border-right:solid 2px white;padding: 5px;background-color:#111111;"|{{914 Item 2|9x19mm|total=15-60 Rounds}} | |colspan="2" style="border-style: solid; border-width: 1px 0 1px 1px;border-right:solid 2px white;padding: 5px;background-color:#111111;"|{{914 Item 2|9x19mm|total=15-60 Rounds}} | ||
|style="padding: 5px;text-align:center;background-color:#111111;"|3 | |style="padding: 5px;text-align:center;background-color:#111111;"|3 | ||
|style="padding: 5px;text-align:center;background-color:#111111;"| | |style="padding: 5px;text-align:center;background-color:#111111;"|{{WeightedProbability|totalWeight=5}} | ||
|- | |- | ||
|colspan="2" style="border-style: solid; border-width: 1px 0 1px 1px;border-right:solid 2px white;padding: 5px;background-color:#111111;"|{{914 Item 2|Fragmentation Grenade|total=1-2}} | |colspan="2" style="border-style: solid; border-width: 1px 0 1px 1px;border-right:solid 2px white;padding: 5px;background-color:#111111;"|{{914 Item 2|Fragmentation Grenade|total=1-2}} | ||
|style="padding: 5px;text-align:center;background-color:#111111;"|2 | |style="padding: 5px;text-align:center;background-color:#111111;"|2 | ||
|style="padding: 5px;text-align:center;background-color:#111111;"| | |style="padding: 5px;text-align:center;background-color:#111111;"|{{WeightedProbability|totalWeight=5}} | ||
|- | |- | ||
|colspan="2" style="border-style: solid; border-width: 1px 0 1px 1px;border-right:solid 2px white;padding: 5px;background-color:#111111;"|{{914 Item 2|Flashbang Grenade|total=1-3}} | |colspan="2" style="border-style: solid; border-width: 1px 0 1px 1px;border-right:solid 2px white;padding: 5px;background-color:#111111;"|{{914 Item 2|Flashbang Grenade|total=1-3}} | ||
|style="padding: 5px;text-align:center;background-color:#111111;"|2 | |style="padding: 5px;text-align:center;background-color:#111111;"|2 | ||
|style="padding: 5px;text-align:center;background-color:#111111;"| | |style="padding: 5px;text-align:center;background-color:#111111;"|{{WeightedProbability|totalWeight=5}} | ||
|} | |||
<big><u>Small Cabinets (HCZ/EZ Checkpoint)</u></big><br> | |||
Due to the small size of this table, these items will always spawn. | |||
{|border="1" style="border-collapse:collapse" | |||
!colspan="2" style="border-style: solid; border-width: 1px 2px 1px 1px;border-right:solid 2px white; text-align:center;padding: 5px;background-color:#333333;" |Item | |||
!style="text-align:center;padding: 5px;background-color:#333333;"|Chambers | |||
|- | |||
|colspan="2" style="border-style: solid; border-width: 1px 0 1px 1px;border-right:solid 2px white;padding: 5px;background-color:#111111;"|{{914 Item 2|9x19mm|total=15-90 Rounds}} | |||
|style="padding: 5px;text-align:center;background-color:#111111;"|3 | |||
|- | |||
|colspan="2" style="border-style: solid; border-width: 1px 0 1px 1px;border-right:solid 2px white;padding: 5px;background-color:#111111;"|{{914 Item 2|5.56x45mm|total=40-80 Rounds}} | |||
|style="padding: 5px;text-align:center;background-color:#111111;"|1 | |||
|} | |} | ||
<big><u>Drawer</u></big><br> | <big><u>Drawer</u></big><br> | ||
| Line 81: | Line 96: | ||
|- | |- | ||
|colspan="2" style="border-style: solid; border-width: 1px 0 1px 1px;border-right:solid 2px white;padding: 5px;background-color:#111111;"|{{914 Item 2|First Aid Kit}} | |colspan="2" style="border-style: solid; border-width: 1px 0 1px 1px;border-right:solid 2px white;padding: 5px;background-color:#111111;"|{{914 Item 2|First Aid Kit}} | ||
|style="padding: 5px;text-align:center;background-color:#111111;"| | |style="padding: 5px;text-align:center;background-color:#111111;"|{{WeightedProbability|weight=2|totalWeight=8}} | ||
|- | |- | ||
|colspan="2" style="border-style: solid; border-width: 1px 0 1px 1px;border-right:solid 2px white;padding: 5px;background-color:#111111;"|{{914 Item 2|Painkillers|total=1-3}} | |colspan="2" style="border-style: solid; border-width: 1px 0 1px 1px;border-right:solid 2px white;padding: 5px;background-color:#111111;"|{{914 Item 2|Painkillers|total=1-3}} | ||
|style="padding: 5px;text-align:center;background-color:#111111;"| | |style="padding: 5px;text-align:center;background-color:#111111;"|{{WeightedProbability|weight=1|totalWeight=8}} | ||
|- | |- | ||
|colspan="2" style="border-style: solid; border-width: 1px 0 1px 1px;border-right:solid 2px white;padding: 5px;background-color:#111111;"|{{914 Item 2|Radio}} | |colspan="2" style="border-style: solid; border-width: 1px 0 1px 1px;border-right:solid 2px white;padding: 5px;background-color:#111111;"|{{914 Item 2|Radio}} | ||
|style="padding: 5px;text-align:center;background-color:#111111;"| | |style="padding: 5px;text-align:center;background-color:#111111;"|{{WeightedProbability|weight=1|totalWeight=8}} | ||
|- | |- | ||
|colspan="2" style="border-style: solid; border-width: 1px 0 1px 1px;border-right:solid 2px white;padding: 5px;background-color:#111111;"|{{914 Item 2|Coin|total=1- | |colspan="2" style="border-style: solid; border-width: 1px 0 1px 1px;border-right:solid 2px white;padding: 5px;background-color:#111111;"|{{914 Item 2|Coin|total=1-20}} | ||
|style="padding: 5px;text-align:center;background-color:#111111;"| | |style="padding: 5px;text-align:center;background-color:#111111;"|{{WeightedProbability|totalWeight=8}} | ||
|} | |} | ||
<small> | <small> | ||
| Line 97: | Line 112: | ||
==Gallery== | ==Gallery== | ||
<gallery mode="packed" widths=600px heights=338px> | |||
Weapon Locker Type 21 Nuke Silo.png| The Weapon Locker Type 21 in Alpha Warhead Silo | |||
049WallWLT21.png| The Weapon Locker Type 21 in SCP-049's armory | |||
</gallery> | |||
==Trivia== | |||
* Prior to the [[Updates/11.0.0|11.0.0]] update, each cabinet on the Weapon Locker Type 21 required a Keycard with Armory Access 2 to open. | |||
*The small size of loot table for HCZ/EZ Checkpoint causes all of the loot to always spawn their maximum amount of times. | |||
**The 9x19mm is set to a Max Chambers of 3 with the 5.56x45mm set to one. | |||
**The 9x19mm and 5.56x45mm in this table are not set to equal spawn chances, they are both 75% and 25% respectively. | |||
{{Locations Navbox}} | {{Locations Navbox}} | ||
Latest revision as of 17:52, 26 October 2022
| Weapon Locker Type 21 | |
|---|---|

| |
| Info | |
| Spawn | SCP-049's Armory Nuke Room Armory |
The Weapon Locker Type 21 is a type of Structure found in SCP: Secret Laboratory.
Description
Weapon Locker Type 21 is a locker that has multiple different cabinet doors.

![]()
![]()
![]()
![]()
![]()
![]()
![]()
![]()
![]()

![]()
![]()
![]()
![]()
![]()
![]()
![]()
![]()
![]()
Location
One Weapon Locker Type 21 will spawn per game.
- One will spawn in SCP-049's Armory or in the Nuke Room Armory.
Possible Loot:
Large Cabinets
![]()
![]()
![]()
![]()
![]()
![]()
![]()
![]()
![]()
The Large Cabinets contain the following loot:
| Item | Max Chambers | Chance | |
|---|---|---|---|
 5.56x45mm (x40-80 Rounds) 5.56x45mm (x40-80 Rounds)
|
3 | 14.29% | |
| 1 | 14.29% | ||
| 2 | 14.29% | ||
| 1 | 14.29% | ||
| 2 | 14.29% | ||
| 2 | 14.29% | ||
| 1 | 14.29% | ||


Small Cabinets
![]()
![]()
![]()
![]()
![]()
![]()
![]()
![]()
![]()
The Small Cabinets have two different loot tables, a "default" loot table, and a second one that is only used for the HCZ/EZ Checkpoint spawn.
| Item | Max Chambers | Chance | |
|---|---|---|---|
| 5.56x45mm (x40-80 Rounds)
|
3 | 40% | |
 9x19mm (x15-60 Rounds) 9x19mm (x15-60 Rounds)
|
3 | 20% | |
 High-Explosive Grenade (x1-2) High-Explosive Grenade (x1-2) |
2 | 20% | |
 Flashbang Grenade (x1-3) Flashbang Grenade (x1-3) |
2 | 20% | |
Small Cabinets (HCZ/EZ Checkpoint)
Due to the small size of this table, these items will always spawn.
| Item | Chambers | |
|---|---|---|
| 9x19mm (x15-90 Rounds)
|
3 | |
| 5.56x45mm (x40-80 Rounds)
|
1 | |
Drawer
No Keycard is required to open.
The drawer at the bottom contains the following loot:
| Item | Chance | |
|---|---|---|
| 37.5% | ||
 Painkillers (x1-3) Painkillers (x1-3) |
25% | |
| 25% | ||
 Coin (x1-20) Coin (x1-20) |
12.5% | |


Max Chambers shows how many times the loot can spawn in a locker. There are nine Chambers, so an item with "Max Chambers 2" can spawn up to two times throughout the locker. It does not mean how much of a item spawns in one chamber.
Gallery
-
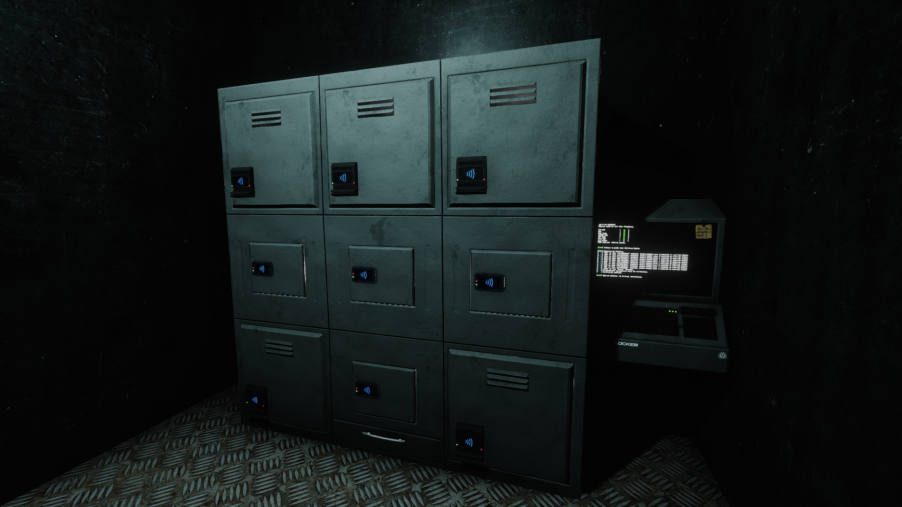
The Weapon Locker Type 21 in Alpha Warhead Silo
-
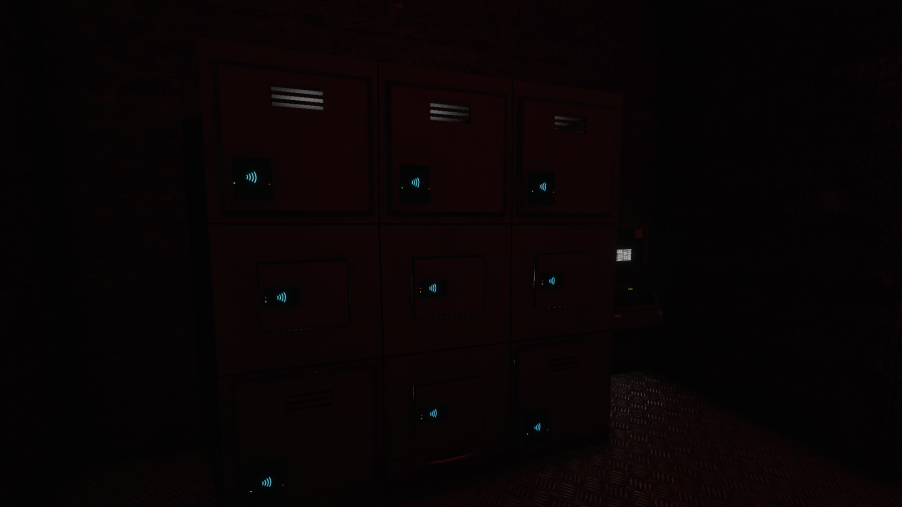
The Weapon Locker Type 21 in SCP-049's armory


Trivia
- Prior to the 11.0.0 update, each cabinet on the Weapon Locker Type 21 required a Keycard with Armory Access 2 to open.
- The small size of loot table for HCZ/EZ Checkpoint causes all of the loot to always spawn their maximum amount of times.
- The 9x19mm is set to a Max Chambers of 3 with the 5.56x45mm set to one.
- The 9x19mm and 5.56x45mm in this table are not set to equal spawn chances, they are both 75% and 25% respectively.
| ||||||||||||||||||||||