Wiki Links
(Finished up with the page. Might add images/soundtracks (for CI) later. idk.) |
No edit summary |
||
| Line 1: | Line 1: | ||
<includeonly>{{CURRENTDAY}}</includeonly> | |||
The '''Surface Zone''' is one of four zones found in ''SCP: Secret Laboratory'' making up the outside area of [[Site-02]]. It is the only zone that will not be destroyed when the [[Alpha Warhead]] detonates, and will always remain accessible the entire round. <br> | |||
__TOC__ | __TOC__ | ||
The zone contains | =Description= | ||
The Surface is one of four zones in Site-02.<br> | |||
The zone contains the terminal to activate the Alpha Warhead detonation sequence, while also containing the spawn points for both [[Mobile Task Force|MTF]] and [[Chaos Insurgent|CI]]. It also is the location of the escape room, where Class-D and Scientist must reach in order to escape. | |||
<br> | <br> | ||
{{Related|Soundtrack}} | {{Related|Soundtrack}} | ||
{{multi-listen start}} | {{multi-listen start}} | ||
| Line 10: | Line 13: | ||
{{multi-listen end}} | {{multi-listen end}} | ||
==Chaos Insurgency Spawn== | ==Chaos Insurgency Spawn== | ||
[[File:{{#switch: {{CURRENTMONTHNAME}} | December = Xmas | [[File:{{#switch: {{CURRENTMONTHNAME}} | December = SZ Xmas Gate A Overview.jpg | SurfaceCAT.png}}|400px|right|thumb|Walkway overlooking CI's spawn]] | ||
[[File: | [[File:Chaos Car Animation.gif|400px|right|thumb|Chaos Car that appears before Chaos respawns]] | ||
This is the spawn location for [[Chaos Insurgent|Chaos Insurgency]]. It is a large, fairly open area that is ideal for sniping. | This is the spawn location for [[Chaos Insurgent|Chaos Insurgency]]. It is a large, fairly open area that is ideal for sniping. | ||
| Line 23: | Line 26: | ||
==Gate-A Elevator== | ==Gate-A Elevator== | ||
[[File:{{#switch: {{CURRENTMONTHNAME}}| December = Xmas | [[File:{{#switch: {{CURRENTMONTHNAME}}| December = SZ Xmas Gate A.jpg |SurfaceGateA.png}}|400px|right|thumb|The Entrance to Gate A]] | ||
[[File:SurfaceGateAOverview.png|400px|right|thumb|The upper area of the Gate A area]] | [[File:{{#switch: {{CURRENTMONTHNAME}}| December = SZ Xmas Walkway.jpg|SurfaceGateAOverview.png}}|400px|right|thumb|The upper area of the Gate A area]] | ||
Located here is the elevator that leads into [[Entrance Zone]].<br> | Located here is the elevator that leads into [[Entrance Zone]].<br> | ||
The area is connected with two entrances: One is a giant opening that leads to the catwalk, while the second is a set of stairs that leads down to a small hallway (which is connected to the main set of stairs). The hallway is often used as a place to hide and sneak around while staying out of sight. | The area is connected with two entrances: One is a giant opening that leads to the catwalk, while the second is a set of stairs that leads down to a small hallway (which is connected to the main set of stairs). The hallway is often used as a place to hide and sneak around while staying out of sight. | ||
| Line 32: | Line 35: | ||
==Warhead Activation Room== | ==Warhead Activation Room== | ||
[[File: | [[File:WarheadControlDoor.png|400px|right|thumb|Entrance to the activation room]] | ||
[[File: | [[File:AlphaControl.png|400px|right|thumb|Inside the activation room]] | ||
Located on the ground level is the Alpha Warhead Activation Room. It is a small room containing the Warhead Activation Console and a [[Workstation]]. It is the only way to activate the warhead detonation sequence. | |||
The door itself can be opened without the usage of a [[Keycard]]. Inside the room is a console that is used to activate the Alpha Warhead. On the console is a button panel that requires a Keycard with {{Hoverimage|{{HoverKeycard|Required Access1=NA}}|text=Nuke Access}} to open. Opening the panel reveals the button to activate the Alpha Warhead. | |||
Located on the ground level is the Alpha Warhead Activation Room. It is a small room containing the Warhead Activation Console and a [[Workstation]]. It is the only way to activate the warhead detonation sequence | |||
In order to initiate the detonation sequence, the [[Heavy_Containment_Zone#Warhead_Silo|Warhead Control Panel]] has to be switched on. If it is on, the console will read "Ready", and the player will then have to press | In order to initiate the detonation sequence, the [[Heavy_Containment_Zone#Warhead_Silo|Warhead Control Panel]], located in at the Warhead Silo in Heavy Containment Zone, has to be switched on. If it is on, the console will read "Ready", and the player will then have to press the button on the console to initiate the sequence. <br> | ||
If the panel is not switched on, then the console will read "Disabled", and the detonation sequence can not be initiated (pressing the button will do nothing). | If the panel is not switched on, then the console will read "Disabled", and the detonation sequence can not be initiated (pressing the button will do nothing). | ||
| Line 47: | Line 47: | ||
==Gate-B Elevator== | ==Gate-B Elevator== | ||
[[File:{{#switch: {{CURRENTMONTHNAME}}| December = Xmas | [[File:{{#switch: {{CURRENTMONTHNAME}}| December = SZ Xmas Tunnel.jpg |SZTunnel.png }}|400px|right|thumb|Tunnel seen from CI's side]] | ||
The area here is inside a tunnel, which connects CI and MTF's spawn locations. There is also | The area here is inside a tunnel, which connects CI and MTF's spawn locations. There is also an elevator system that leads down into [[Entrance Zone]]. The path to the elevator is slightly elevated above the ground. | ||
The road from the Gate A section continues here, and begins to slope upwards as the tunnel ends. | The road from the Gate A section continues here, and begins to slope upwards as the tunnel ends. | ||
<br clear=all> | <br clear=all> | ||
==Mobile Task Force Spawn== | ==Mobile Task Force Spawn== | ||
[[File:{{#switch: {{CURRENTMONTHNAME}}| December = | [[File:{{#switch: {{CURRENTMONTHNAME}}| December = SZ Xmas MTF Spawn.jpg|SZMTFSpawn.png}}|400px|right|thumb|NTF's spawn area]] | ||
[[File: | [[File:MTF Heli Animation.gif|400px|right|thumb|The helicopter that appears before NTF respawn]] | ||
This is the spawn location for [[Mobile Task Force|MTF]]. It is a large, open area where the road curves right and passes through a locked gate. Located nearby is the Escape Room. <br> | This is the spawn location for [[Mobile Task Force|MTF]]. It is a large, open area where the road curves right and passes through a locked gate. Located nearby is the Escape Room. <br> | ||
It should be noted that there is no roof to this area as opposed to the Gate B Elevator section. | It should be noted that there is no roof to this area as opposed to the Gate B Elevator section. | ||
| Line 62: | Line 63: | ||
<br clear=all> | <br clear=all> | ||
==Escape Room== | ==Escape Room== | ||
{{DoorDestroy|ImmunityLvl=Lvl1|imageshow=yes}} | {{DoorDestroy|ImmunityLvl=Lvl1|imageshow=yes}} | ||
[[File: | [[File:SurfaceEscapeEntrance.png|400px|right|thumb|Entrance to the Escape Room]] | ||
[[File:{{#switch: {{CURRENTMONTHNAME}}| December = Xmas | [[File:{{#switch: {{CURRENTMONTHNAME}}| December =SZ Xmas Escape.jpg |SurfaceEscapeAreaPath.png }}|400px|right|thumb|The end of the pathway at the Escape Room]] | ||
The escape room is located near the MTF spawn location. Players will have to go though a pathway with two doors, before they reach the escape area. | The escape room is located near the MTF spawn location. Players will have to go though a pathway with two doors, before they reach the escape area. | ||
If a [[Class-D]] or [[Scientist]] enters the escape room, they will be respawned as a [[Chaos Insurgent|Chaos Insurgency Conscripts]] or [[Mobile Task Force|MTF Specialists]] respectively. | If a [[Class-D Personnel|Class-D]] or [[Scientist]] enters the escape room, they will be respawned as a [[Chaos Insurgent|Chaos Insurgency Conscripts]] or [[Mobile Task Force|MTF Specialists]] respectively. | ||
If a certain config option is turned on for the server, disarming Class-Ds or Scientists will reverse the team they respawn as when escaping. | If a certain config option is turned on for the server, disarming Class-Ds or Scientists will reverse the team they respawn as when escaping. | ||
A disarmed Class-D that escapes will become a Nine Tailed Fox Private, while a disarmed Scientist escaping will become Chaos Conscript.<br> | A disarmed Class-D that escapes will become a Nine Tailed Fox Private, while a disarmed Scientist escaping will become Chaos Conscript.<br> | ||
| Line 79: | Line 81: | ||
The Tutorial Tower is a small room located in the top of one of the 5 towers on surface. It is the spawn location for [[Tutorial|Tutorials]]. | The Tutorial Tower is a small room located in the top of one of the 5 towers on surface. It is the spawn location for [[Tutorial|Tutorials]]. | ||
Due to the nature of tutorial spawning, the room can only be accessed via Remote Admin. | Due to the nature of tutorial spawning, the room can only be accessed via Remote Admin. | ||
<br clear=all> | |||
==Trivia== | ==Trivia== | ||
* | * A light above the Chaos Insurgency spawn seemingly flickers ever couple of seconds. | ||
* The Surface is the only zone that will always remain playable throughout the entire round. | * The Surface is the only zone that will always remain playable throughout the entire round. | ||
* The | * The Tutorial Tower is mostly used by server admins in order to communicate with other players without being interrupted. | ||
[[Category:Zones]] | [[Category:Zones]] | ||
{{Locations Navbox}} | |||
Revision as of 01:27, 28 March 2022
The Surface Zone is one of four zones found in SCP: Secret Laboratory making up the outside area of Site-02. It is the only zone that will not be destroyed when the Alpha Warhead detonates, and will always remain accessible the entire round.
Contents
Description
The Surface is one of four zones in Site-02.
The zone contains the terminal to activate the Alpha Warhead detonation sequence, while also containing the spawn points for both MTF and CI. It also is the location of the escape room, where Class-D and Scientist must reach in order to escape.
Related article: Soundtrack
Chaos Insurgency Spawn

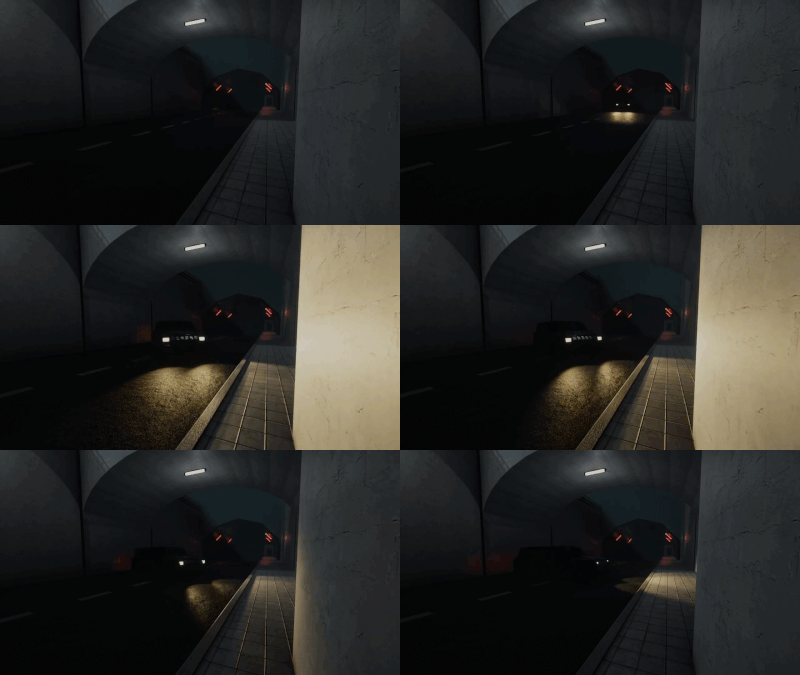
This is the spawn location for Chaos Insurgency. It is a large, fairly open area that is ideal for sniping.
A staircase that leads raised catwalk and the Gate-A elevator can be found on the right. The catwalk surrounds the entire Gate A section and can be used to snipe players that are below.
A road can also be seen on the ground level of this area. The road starts out behind a locked gate and travels through a short tunnel before sloping upwards. The road then continues through the Gate-B Elevator section.
A single (inaccessible) door can also be seen next to the locked gate.
Moments before a Chaos spawn, a car will drive though the locked gate. It will continue forward before making a stop below the raised catwalk. Chaos will then spawn in, and the car will exit the area through where it came from.
Gate-A Elevator

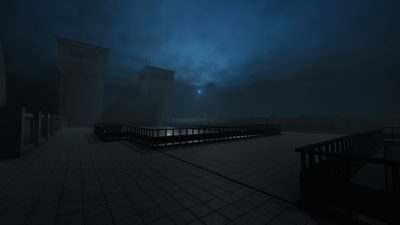
Located here is the elevator that leads into Entrance Zone.
The area is connected with two entrances: One is a giant opening that leads to the catwalk, while the second is a set of stairs that leads down to a small hallway (which is connected to the main set of stairs). The hallway is often used as a place to hide and sneak around while staying out of sight.
Several (inaccessible) doors can be found here, as well as two (inaccessible) gaps which show a second road.
Warhead Activation Room
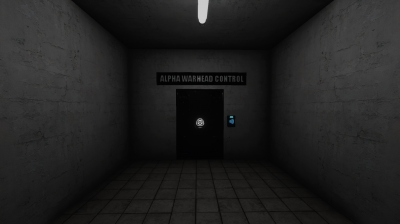
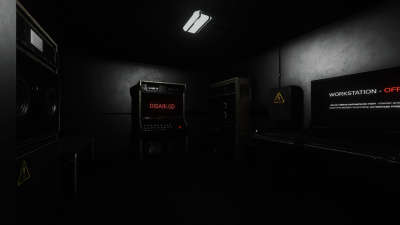
Located on the ground level is the Alpha Warhead Activation Room. It is a small room containing the Warhead Activation Console and a Workstation. It is the only way to activate the warhead detonation sequence.
The door itself can be opened without the usage of a Keycard. Inside the room is a console that is used to activate the Alpha Warhead. On the console is a button panel that requires a Keycard with
Nuke Access Nuke Accessto open. Opening the panel reveals the button to activate the Alpha Warhead.
In order to initiate the detonation sequence, the Warhead Control Panel, located in at the Warhead Silo in Heavy Containment Zone, has to be switched on. If it is on, the console will read "Ready", and the player will then have to press the button on the console to initiate the sequence.
If the panel is not switched on, then the console will read "Disabled", and the detonation sequence can not be initiated (pressing the button will do nothing).
Gate-B Elevator

The area here is inside a tunnel, which connects CI and MTF's spawn locations. There is also an elevator system that leads down into Entrance Zone. The path to the elevator is slightly elevated above the ground.
The road from the Gate A section continues here, and begins to slope upwards as the tunnel ends.
Mobile Task Force Spawn
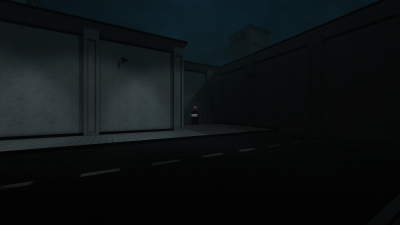
This is the spawn location for MTF. It is a large, open area where the road curves right and passes through a locked gate. Located nearby is the Escape Room.
It should be noted that there is no roof to this area as opposed to the Gate B Elevator section.
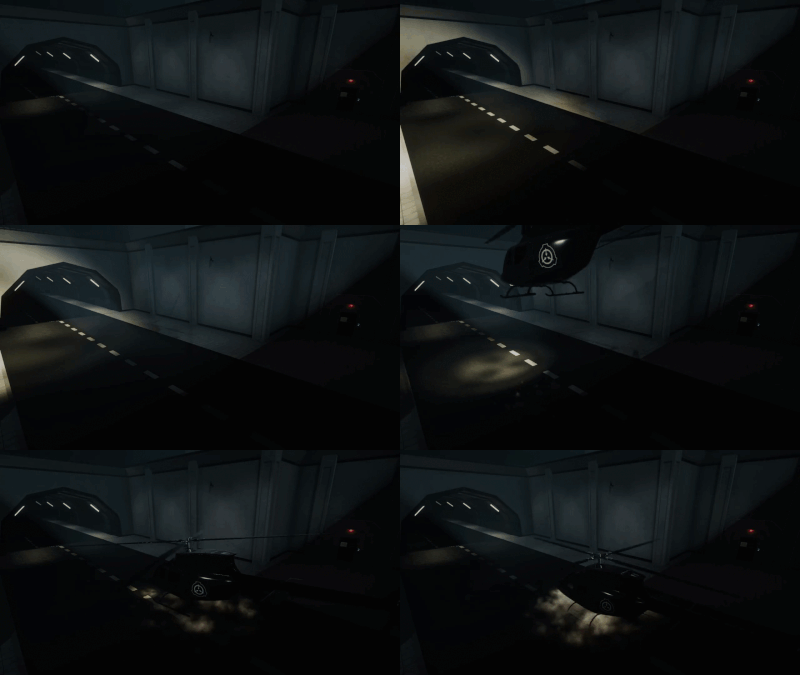
Moments before a MTF spawn, a helicopter will fly over the wall, and will hover above the road. MTF will then spawn in, and the helicopter will leave, flying back out through the way it came from.
Escape Room
![]() Door Destroyable by: SCP-018, Fragmentation Grenades and SCP-096
Door Destroyable by: SCP-018, Fragmentation Grenades and SCP-096

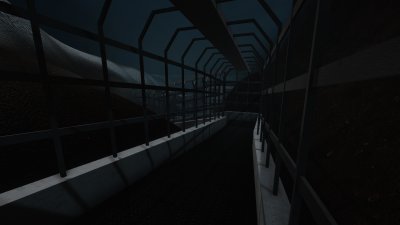
The escape room is located near the MTF spawn location. Players will have to go though a pathway with two doors, before they reach the escape area.
If a Class-D or Scientist enters the escape room, they will be respawned as a Chaos Insurgency Conscripts or MTF Specialists respectively.
If a certain config option is turned on for the server, disarming Class-Ds or Scientists will reverse the team they respawn as when escaping.
A disarmed Class-D that escapes will become a Nine Tailed Fox Private, while a disarmed Scientist escaping will become Chaos Conscript.
Entering the escape room as any other class will have no effect.
Tutorial Tower
The Tutorial Tower is a small room located in the top of one of the 5 towers on surface. It is the spawn location for Tutorials.
Due to the nature of tutorial spawning, the room can only be accessed via Remote Admin.
Trivia
- A light above the Chaos Insurgency spawn seemingly flickers ever couple of seconds.
- The Surface is the only zone that will always remain playable throughout the entire round.
- The Tutorial Tower is mostly used by server admins in order to communicate with other players without being interrupted.
| ||||||||||||||||||||||
- This page was last edited on 28 March 2022, at 01:27.
- Content is available under CC BY-SA 3.0 unless otherwise noted.
- Privacy policy
- About SCP: Secret Laboratory Public Beta Official Wiki
- Disclaimers
